Common problems on a desktop (Windows, Mac, Linux OS)
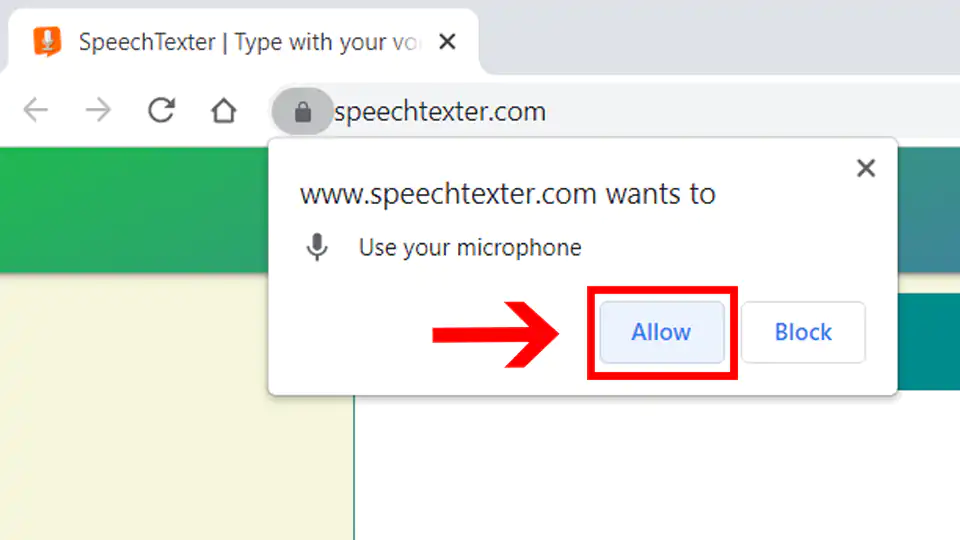
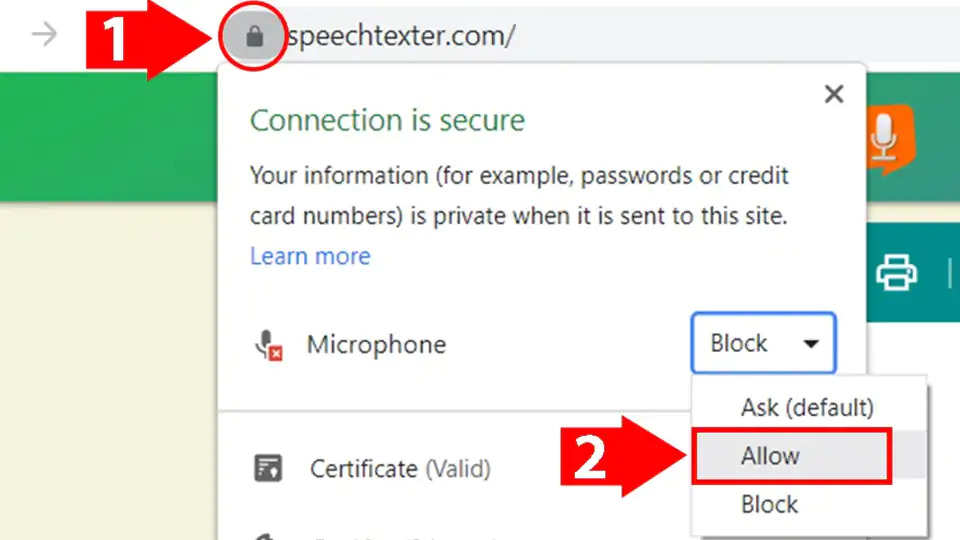
Error: 'SpeechTexter cannot access your microphone'.
Please give permission to access your microphone.
Click on the "padlock" icon next to the URL bar, find the "microphone" option, and choose
"allow".
Error: 'No speech was detected. Please try again'.
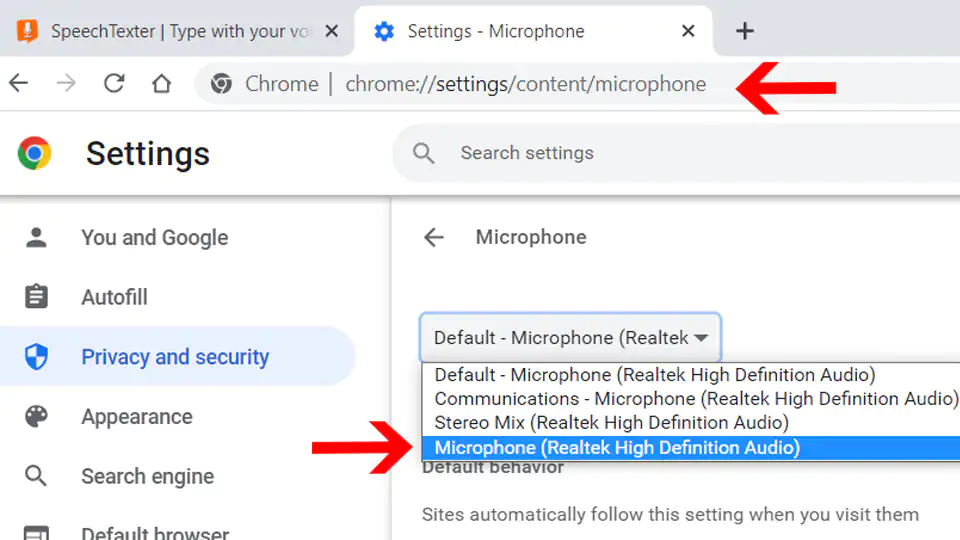
If you get this error while you are speaking, make sure your microphone is set as the default
recording
device on your browser [see step 2].
If you're using a headset, make sure the mute switch on the cord is off.
Error: 'Network error'
The internet connection is poor. Please try again later.
The result won't transfer to the "editor".
The result confidence is not high enough or there is a background noise. An accumulation of long
text
in the buffer can also make the engine stop responding, please make some pauses in the speech.
The results are wrong.
Please speak loudly and clearly. Speaking clearly and consistently will help the software
accurately recognize your words.
Reduce background noise. Background noise from fans, air conditioners, refrigerators, etc.
can drop the accuracy significantly. Try to reduce background noise as much as possible.
Speak directly into the microphone. Speaking directly into the microphone enhances the
accuracy of the software. Avoid speaking too far away from the microphone.
Speak in complete sentences. Speaking in complete sentences will help the software better
recognize the context of your words.
Can I upload an audio file and get the transcription?
No, this feature is not available.
How do I transcribe an audio (video) file on my PC or from the web?
Playback your file in any player and hit the 'mic' button on the SpeechTexter website to start
capturing
the speech. For better
results select "Stereo Mix" as the default recording device on your browser, if you are
accessing
SpeechTexter and the file from the same device.
I don't see the "Stereo mix" option (Windows OS)
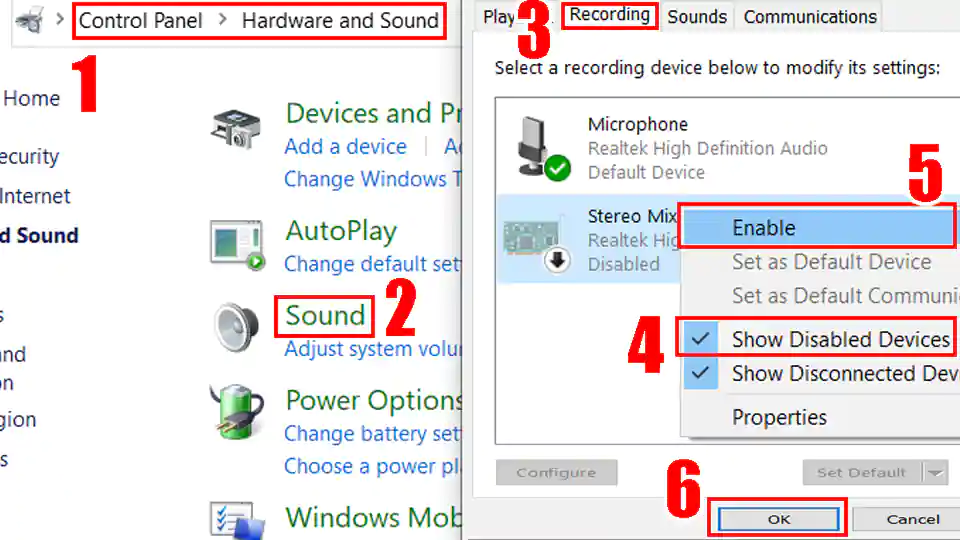
"Stereo Mix" might be hidden or it's not supported by your system. If you are a Windows user go
to
'Control panel'
→ Hardware and Sound → Sound → 'Recording' tab. Right-click on a blank area in the pane and make
sure both "View Disabled Devices" and "View Disconnected Devices" options are checked. If
"Stereo
Mix" appears, you can enable it by right clicking on it and choosing 'enable'. If "Stereo Mix"
hasn't appeared, it means it's not supported by your system. You can try using a third-party
program
such as "Virtual Audio Cable" or "VB-Audio Virtual Cable" to create a virtual audio device that
includes "Stereo Mix" functionality.
How to use the voice commands list?
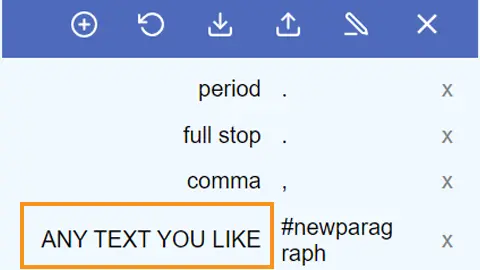
The voice commands list allows you to insert the punctuation, some text, or run some preset
functions using only your voice.
On the first column you enter your voice command. On the second column you enter a
punctuation
mark or a function. Voice commands are case-sensitive.
Available functions:
#newparagraph (add a new paragraph),
#newline (add a new line),
#undo (undo the last change),
#redo (redo the last change)
To use the function above make a pause in your speech until all previous dictated speech appears
in
your note, then say "insert a new paragraph" and wait for the command execution.
Found a mistake in the voice commands list or want to suggest an update?
Follow the steps below:
- Navigate to the voice commands list [↑] on this website.
- Click on the edit button to update or add new punctuation marks you think other users might find
useful in your language.
- Click on the "Export" button located above the voice commands list to save your list in JSON
format to your device.
Next, send us your file as an attachment via email. You can find the email address at the bottom
of the page. Feel free to include a brief description of the
mistake or the updates you're suggesting in the email body.
Your contribution to the improvement of the services is appreciated.
Can I prevent my custom voice commands from disappearing after closing the browser?
SpeechTexter by default saves your data inside your browser's cache. If your browsers clears the
cache your data will be deleted.
However, you can export your custom voice commands to your device and import them when you
need
them by clicking the corresponding buttons above the list.
SpeechTexter is using JSON format to store your voice commands.
You can create a .txt file in this format on your device and then import it into SpeechTexter.
An example of JSON format is shown below:
{
"period": ".",
"full stop": ".",
"question mark": "?",
"new line": "#newline",
"new paragraph": "#newparagraph"
}
I lost my dictated work after closing the browser.
SpeechTexter doesn't store any text that you dictate. Please use the "autosave" option or click
the
"download" button (recommended). The "autosave" option will try to store your work inside your
browser's cache, where it will remain until you switch the "text autosave" option off, clear the
cache manually, or if your browser clears the cache on exit.
Common problems on the Android app
I get the message: 'Speech recognition is not available'.
'Google app' from Play store is required for SpeechTexter to work. download [↗]
Where does SpeechTexter store the saved files?
Version 1.5 and above stores the files in the internal memory.
Version 1.4.9 and below stores the files inside the "SpeechTexter" folder at the root directory
of
your device.
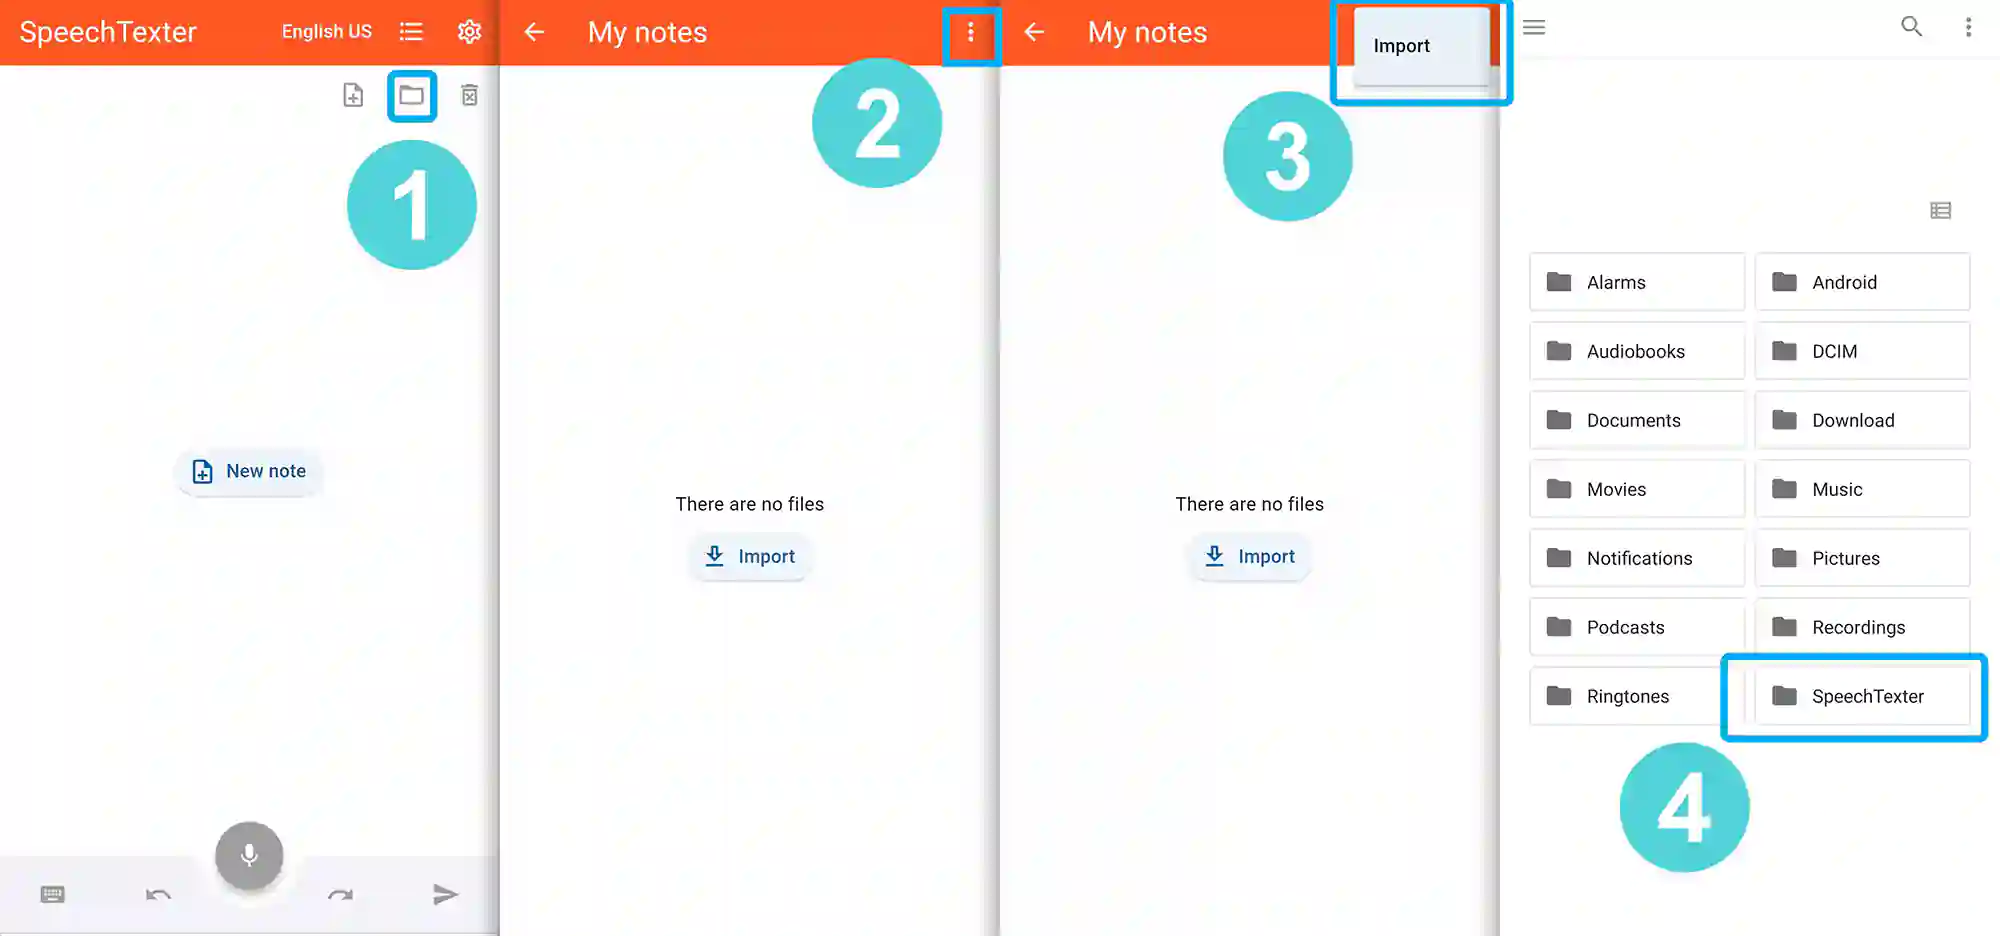
After updating the app from version 1.x.x to version 2.x.x my files have disappeared
As a result of recent updates, the Android operating system has implemented restrictions that
prevent
users from accessing folders within the Android root directory, including SpeechTexter's folder.
However, your old files can still be imported manually by selecting the "import" button within
the
Speechtexter application.
Common problems on the mobile web app
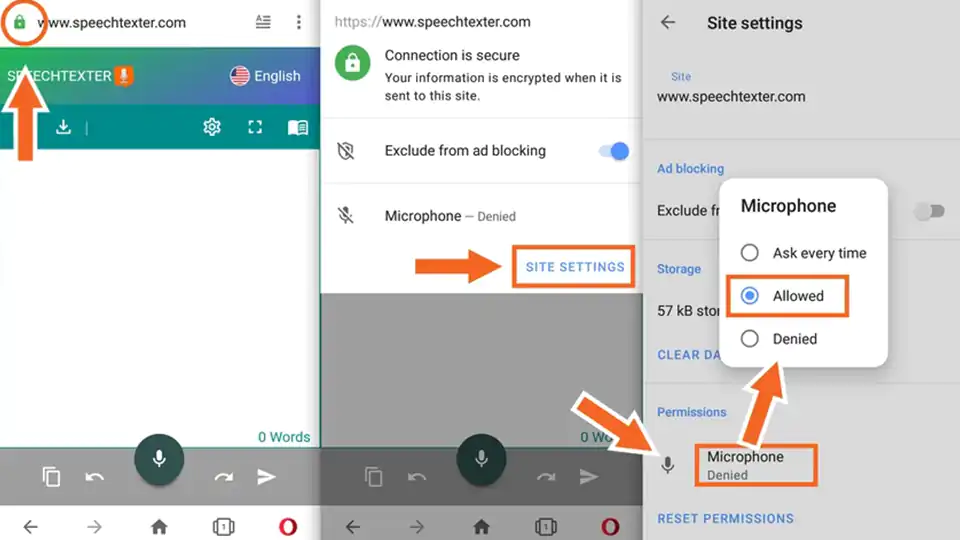
Error: 'SpeechTexter cannot access your microphone'.
Please give permission to access your microphone.
Tap on the "padlock" icon next to the URL bar, find the "microphone" option and choose "allow".
